深度管理
每一个容器都有深度管理功能,它就像排队一样。

每一个显示对象在其父级的容器中都拥有一个属于自己的深度值,而且这个值相对于同级显示对象是唯一的。深度值实际上就是一个显示对象的叠放次序。也可称为 “z-次序”。
深度是由每个容器的子对象列表所管理。每个容器都清楚自己拥有多少个子对象。可以通过容器的 numChildren 属性来获取当前容器的子对象数量。
容器.numChildren
在对深度的控制管理中,Egret提供了一些方便有效的深度管理API。
1.深度顺序
Egret中容器的深度都是从0开始的,当第一个显示对象被添加到容器中时,它的深度值为0。这个显示对象处于容器的最底层。当添加第二个显示对象的时候,它的深度值为1,并且在第一个显示对象上方。如果两个显示对象发生了相交,那么可以从视觉上看到,第二个显示对象遮挡住第一个显示对象。
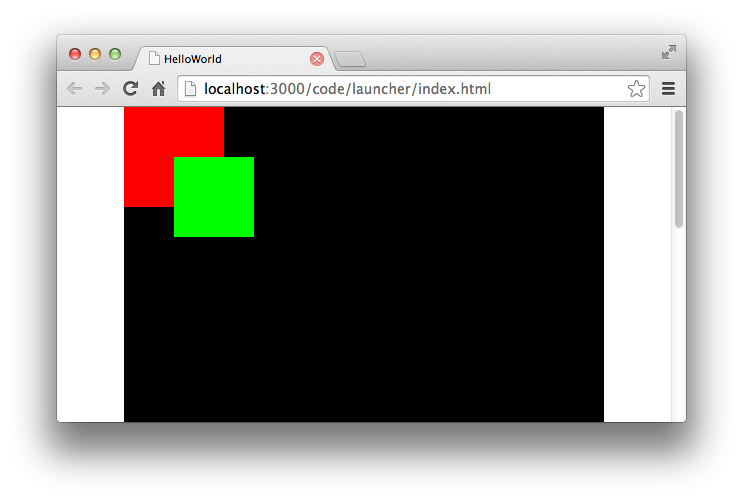
下面的示例中,创建了两个显示对象,并且让他们发生遮挡,依次查看显示对象的深度值关系。
const spr1: egret.Sprite = new egret.Sprite();spr1.graphics.beginFill(0xff0000);spr1.graphics.drawRect(0, 0, 100, 100);spr1.graphics.endFill();this.addChild(spr1);const spr2: egret.Sprite = new egret.Sprite();spr2.graphics.beginFill(0x00ff00);spr2.graphics.drawRect(0, 0, 80, 80);spr2.graphics.endFill();spr2.x = 50;spr2.y = 50;this.addChild(spr2);
运行效果如下:
2.添加/删除指定深度的对象
使用的 addChild() 方法会默认按照当前子对象深度进行排序,从0开始,每次深度加1,以此类推。
若要将某一个显示对象添加到一个指定深度的时候,需要使用 addChildAt() 方法。
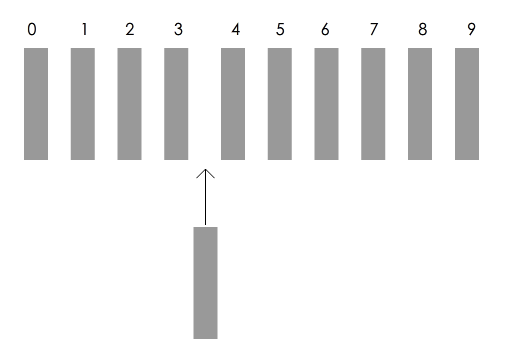
addChildAt()具体使用方法如下:
容器.addChildAt( 显示对象, 深度值 )
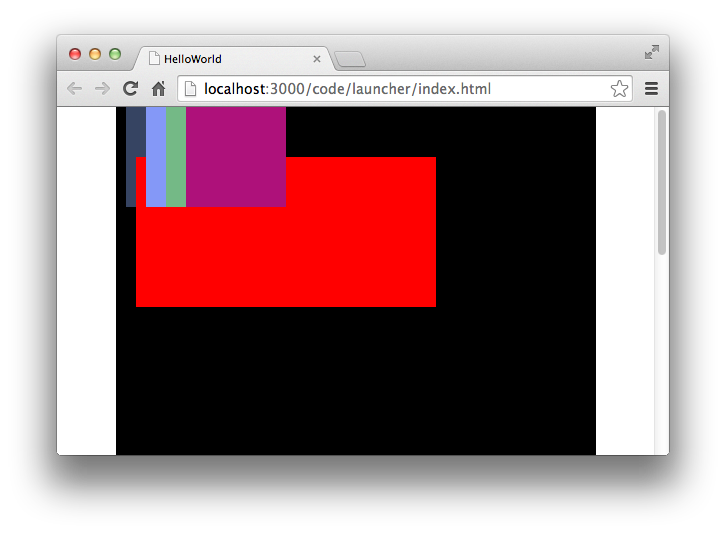
在下面的示例中,随机绘制四个颜色不同的正方形,将它们依次叠加排列,然后新建一个显示对象,并且放到深度为1的位置。
const sprcon: egret.Sprite = new egret.Sprite();this.addChild(sprcon);sprcon.x = 10;for (const i: number = 0; i < 4; i++) {const spr: egret.Sprite = new egret.Sprite();spr.graphics.beginFill(0xffffff * Math.random());spr.graphics.drawRect(0, 0, 100, 100);spr.graphics.endFill();spr.x = i * 20;sprcon.addChild(spr);}const sprNew: egret.Sprite = new egret.Sprite();sprNew.graphics.beginFill(0xff0000);sprNew.graphics.drawRect(0, 0, 300, 150);sprNew.graphics.endFill();sprNew.x = 10;sprNew.y = 50;sprcon.addChildAt(sprNew, 1);
运行效果如图:
在删除显示对象时同样可以通过深度来进行控制。
可以使用 容器.removeChild( 显示对象 ) 将一个显示对象移除显示列表,同样,还可以使用
容器.removeChildAt( 深度值 ) 来删除一个指定深度的显示对象。
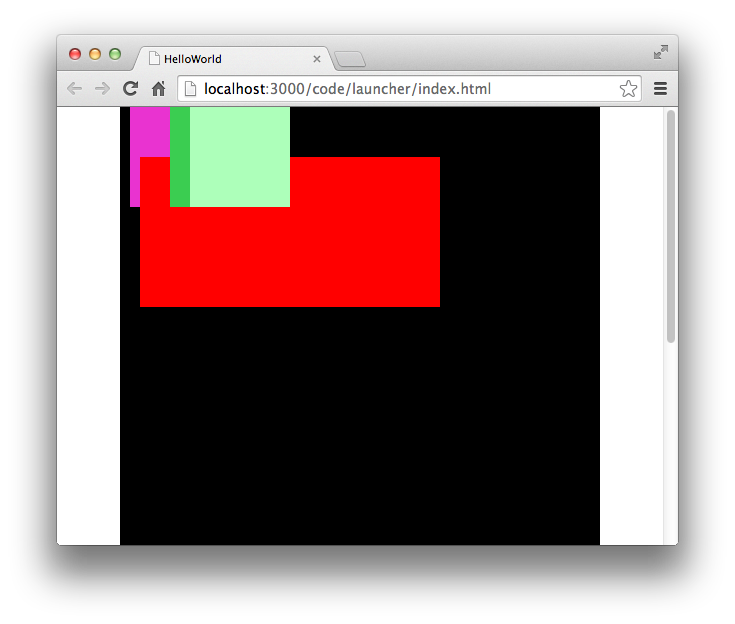
通过对上面示例代码的修改,将深度值为2的显示对象移除显示列表。
const sprcon: egret.Sprite = new egret.Sprite();this.addChild(sprcon);sprcon.x = 10;for (const i: number = 0; i < 4; i++) {const spr: egret.Sprite = new egret.Sprite();spr.graphics.beginFill(0xffffff * Math.random());spr.graphics.drawRect(0, 0, 100, 100);spr.graphics.endFill();spr.x = i * 20;sprcon.addChild(spr);}const sprNew: egret.Sprite = new egret.Sprite();sprNew.graphics.beginFill(0xff0000);sprNew.graphics.drawRect(0, 0, 300, 150);sprNew.graphics.endFill();sprNew.x = 10;sprNew.y = 50;sprcon.addChildAt(sprNew, 1);sprcon.removeChildAt(2);
运行效果如下:
若要一次性将一个容器内的所有子对象全部删除,不需要使用下方代码所示遍历操作:
const numChild: number = sprcon.numChildren;for (const t: number = 0; t < numChild; t++) {sprcon.removeChildAt(0);}
Egret 提供了一个更加方便快捷的方法,使用 removeChildren() 方法可以将当前容器内的所有子对象全部移除显示列表。
使用方法如下:
容器.removeChildren();
依然使用上面的示例,继续在后面编写代码:
sprcon.removeChildren();
编译并运行,舞台sprcon内没有任何显示对象显示。
3.交换不同深度对象
Egret 为开发者提供了两个方法实现交换不同对象深度的功能。一个是 swapChildren() 方法,另外一个是 swapChildrenAt() 方法。
具体使用方法如下:
容器.swapChildren( 显示对象, 显示对象 )
容器.swapChildrenAt( 深度值, 深度值 )
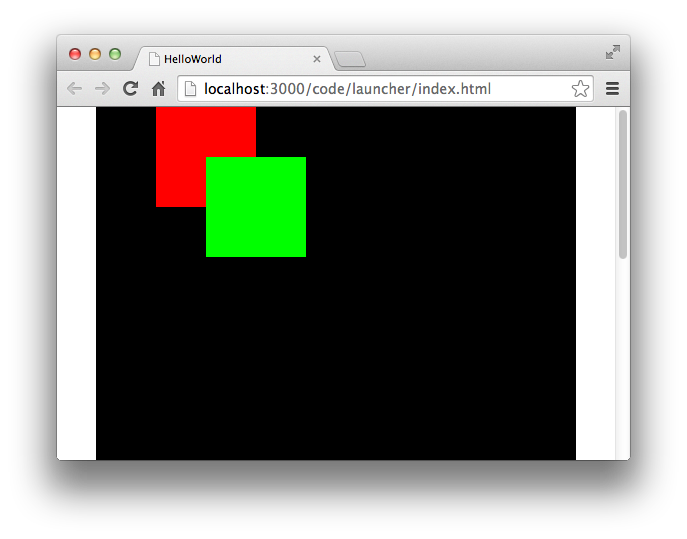
下面示例中,创建一个sprcon容器,并向其中绘制两个颜色不同的方块。然后分别使用上面两个方法互换两个方块的深度值。
const sprcon: egret.Sprite = new egret.Sprite();this.addChild(sprcon);sprcon.x = 10;const spr1: egret.Sprite = new egret.Sprite();spr1.graphics.beginFill(0xff0000);spr1.graphics.drawRect(0, 0, 100, 100);spr1.graphics.endFill();spr1.x = 50;sprcon.addChild(spr1);const spr2: egret.Sprite = new egret.Sprite();spr2.graphics.beginFill(0x00ff00);spr2.graphics.drawRect(0, 0, 100, 100);spr2.graphics.endFill();spr2.x = 100;spr2.y = 50;sprcon.addChild(spr2);
运行效果如图:
使用第一种方法进行两个方块的深度互换:
sprcon.swapChildren( spr1, spr2 );
使用第二种方法进行两个方块的深度互换:
sprcon.swapChildrenAt( 0, 1 );
4.重设子对象深度
当一个显示对象添加到显示列表中后,可以手动重设这个显示对象的深度。
实现显示对象深度重置的方法是 setChildIndex() ,使用方法如下:
容器.setChildIndex( 显示对象, 新的深度值 );
示例代码如下:
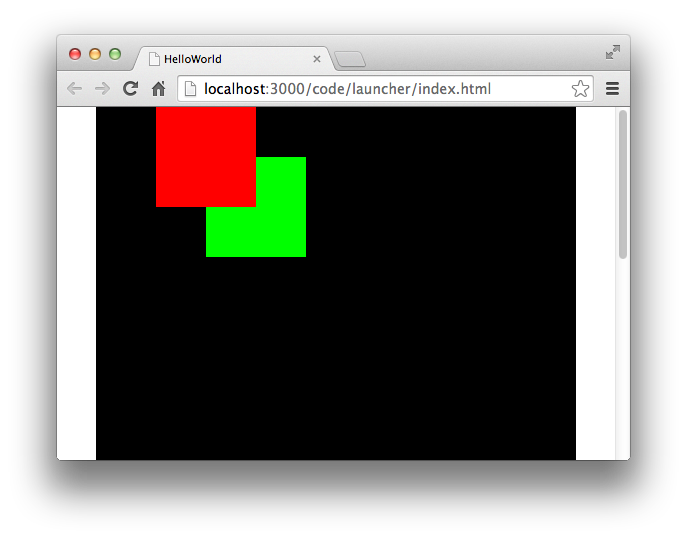
const sprcon: egret.Sprite = new egret.Sprite();this.addChild(sprcon);sprcon.x = 10;const spr1: egret.Sprite = new egret.Sprite();spr1.graphics.beginFill(0xff0000);spr1.graphics.drawRect(0, 0, 100, 100);spr1.graphics.endFill();spr1.x = 50;sprcon.addChild(spr1);const spr2: egret.Sprite = new egret.Sprite();spr2.graphics.beginFill(0x00ff00);spr2.graphics.drawRect(0, 0, 100, 100);spr2.graphics.endFill();spr2.x = 100;spr2.y = 50;sprcon.addChild(spr2);sprcon.setChildIndex(spr1, 1);
上面这段代码中默认是绿色的方块遮盖在红色方块上方的,通过对spr1(红色方块)的深度重置(重置为1)将其放置于绿色方块上方。
运行效果如图:
5.访问容器子对象
Egret 提供两种访问容器子对象的方法: getChildAt() 和 getChildByName() 方法。
具体使用方法如下:
容器.getChildAt( 深度值 );
容器.getChildByName( 显示对象 )
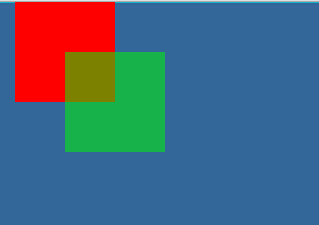
下面示例代码中,向一个容器中存放了两个方块,通过深度来获取其中一个方块,并调整它的透明度。
const sprcon: egret.Sprite = new egret.Sprite();this.addChild(sprcon);sprcon.x = 10;const spr1: egret.Sprite = new egret.Sprite();spr1.graphics.beginFill(0xff0000);spr1.graphics.drawRect(0, 0, 100, 100);spr1.graphics.endFill();spr1.x = 50;spr1.name = "sprite1";sprcon.addChild(spr1);const spr2: egret.Sprite = new egret.Sprite();spr2.graphics.beginFill(0x00ff00);spr2.graphics.drawRect(0, 0, 100, 100);spr2.graphics.endFill();spr2.x = 100;spr2.y = 50;spr2.name = "sprite2";sprcon.addChild(spr2);const _spr: egret.DisplayObject = sprcon.getChildAt(1);_spr.alpha = 0.5;
编译并运行代码,效果如图:
下面示例代码中,通过显示对象的 name 获取其中一个方块,并调整它的透明度。
const sprcon: egret.Sprite = new egret.Sprite();this.addChild(sprcon);sprcon.x = 10;const spr1: egret.Sprite = new egret.Sprite();spr1.graphics.beginFill(0xff0000);spr1.graphics.drawRect(0, 0, 100, 100);spr1.graphics.endFill();spr1.x = 50;spr1.name = "sprite1";sprcon.addChild(spr1);const spr2: egret.Sprite = new egret.Sprite();spr2.graphics.beginFill(0x00ff00);spr2.graphics.drawRect(0, 0, 100, 100);spr2.graphics.endFill();spr2.x = 100;spr2.y = 50;spr2.name = "sprite2";sprcon.addChild(spr2);const _spr: egret.DisplayObject = sprcon.getChildByName("sprite2");_spr.alpha = 0.5;
编译并运行代码,效果如图:

- 两种获取方式对比
通过深度值和 name 属性获取子对象的作用是相同的,但Egret在内部的实现原理却大大不同。
使用深度值获取子对象时,Egret会根据当前容器的显示列表查找指定深度的显示对象,并作为返回值返回给用户。这种检索方式是快速的,不需要进行大量运算。
通过name属性来获取子对象,Egret内部首先会对当前容器的所有子对象进行编译,同时匹配相同的 name 属性值,当发现相同 name 属性的时候,则将该子对象作为返回值返回给用户。虽然在Egret内部进行了相关算法优化,但还是在消耗了一些性能。
因此推荐使用第一种方法,通过深度值来获取子对象。